Are you ready to unlock the secret sauce to stunning photography? If you’re a beginner, mastering composition rules is your golden ticket to transforming ordinary shots into captivating visual masterpieces. Dive into this beginner’s guide on composition, where we unravel the mysteries behind the Rule of Thirds, leading lines, and the magic of balance and symmetry.
First, we’ll explore the Rule of Thirds, a game-changing concept that can elevate your framing skills. Whether you’re capturing landscapes, portraits, or street photography, this rule can help you create more dynamic and engaging photos. Discover how to apply it in different scenarios, and you’ll soon realize its potential for turning your snapshots into professional-looking images.
Next up, leading lines. These are the visual highways that guide the viewer’s eyes through your composition, making your photos both compelling and easy to navigate. From pathways and rivers to architectural elements, you’ll learn how to spot and use different types of leading lines to your advantage. Imagine your viewer’s eyes dancing through your image, moving exactly where you want them to—sounds powerful, right?
Finally, we delve into the art of achieving balance and symmetry. Whether you’re aiming for the classic appeal of symmetrical balance or the dynamic tension of an asymmetrical arrangement, knowing how to balance elements within your frame is crucial. Discover the distinct types of balance and practical tips for integrating them into your work. Symmetry, in particular, can be a mighty tool in creating aesthetically pleasing photographs that resonate with viewers.
By the end of this article, you’ll have a toolkit brimming with composition strategies to elevate your photography from beginner snapshots to visually stunning images. Ready to create photos that pop? Let’s get started!
Understanding the Rule of Thirds in Photography
Explanation of the Rule of Thirds
The Rule of Thirds is one of the most commonly used guidelines in photography composition. Essentially, it involves dividing your image into nine equal parts by drawing two equally spaced horizontal lines and two equally spaced vertical lines. The goal is to place the most important elements of your scene along these lines or at the points where they intersect, which are known as the ‘power points.’ This helps to create more tension, energy, and interest in the composition compared to simply centering the subject.
Imagine you’re framing a photograph of a coastal landscape. Instead of placing the horizon dead center, you would align it along the upper or lower third line. Not only does this make your photo more dynamic, but it also encourages viewers to explore the entire image rather than focusing on a centralized subject.
How to Apply the Rule of Thirds in Various Photography Scenarios
Understanding how to apply the Rule of Thirds is like having a secret ingredient that can elevate your photography from meh to magical. Let’s dive into a few practical examples:
Landscape Photography
When capturing landscapes, aligning the horizon with the upper or lower third can produce a balanced visually pleasing image. For instance, if the sky is particularly dramatic with interesting cloud formations, let it take up the top two-thirds of the frame. Conversely, if the foreground is full of exciting details like flowers or leading lines, give it the larger portion.
Portrait Photography
For portraits, placing your subject’s eyes near the upper third line draws attention naturally. This technique works whether your subject is looking directly at the camera or gazing off into the distance. Positioning people off-center can also help include interesting background elements, thus providing context and depth to the shot.
Action and Sports Photography
Align your subject with the intersecting points or along the thirds when capturing movement to create a sense of direction and space. If someone is running, surfing, or biking, placing them on one side of the frame leaves room for them to ‘move into,’ making the action feel more dynamic and less cramped.
Still Life and Macro Photography
Even in still life or macro shots, such as food photography or capturing a flower, positioning the main point of interest at an intersection can make your composition stand out. This approach adds an element of surprise and makes your photo more engaging.
Architecture Photography
While photographing buildings or interiors, aligning lines and key features with the grid helps in achieving a balanced composition. Highlight structural elements like doorways or windows by positioning them along these lines or intersection points for added visual interest.
Benefits of Using the Rule of Thirds for Beginners
Starting out in photography can be overwhelming, with so many things to focus on—the right lighting, timing, settings, and so forth. The Rule of Thirds offers a simple yet powerful way to start mastering composition without being overly technical.
Enhanced Visual Appeal
Utilizing this rule helps create more engaging compositions by guiding the viewer’s eye through the frame. It breaks the monotony of centered subjects, adding movement and flow to the image.
Improved Balance and Proportions
The Rule of Thirds naturally encourages better balance and proportion in your photos. By placing elements off-center, your image tends to have a more harmonious distribution of weight, making it more pleasing to the eye.
Encourages Creativity
Working within the constraints of the Rule of Thirds can actually boost your creativity. It pushes you to think beyond the obvious, experiment with different compositions, and learn how to position different elements in unique and compelling ways.
Simplifies Decision-Making
As a beginner, you might find it difficult to decide where to place your subject. The Rule of Thirds simplifies this process by providing a clear framework. By aligning elements along the grid lines or intersection points, you ensure a balanced, visually appealing composition.
Builds a Strong Foundation
Once you’re comfortable with the Rule of Thirds, it becomes easier to experiment with breaking it intentionally. Understanding the basics allows for more informed deviation, letting you break the rule effectively when the situation calls for a different approach.
So there you have it! The Rule of Thirds is like the Swiss Army knife of photography composition—simple yet versatile, and endlessly useful for crafting striking images.

The Importance of Leading Lines in Photographic Composition
As a photography beginner, you might often hear about the term leading lines. Understanding and effectively using leading lines can be a game-changer in your photographic journey. Let’s dive into what leading lines are, the different types, how they guide the viewer’s eye, and some examples to improve your shots.
Definition and Types of Leading Lines
Leading lines are visual elements within a photograph that naturally draw the viewer’s eye towards a particular focal point. These lines can be found in various forms and settings, enhancing the depth and overall impact of your image.
There are several types of leading lines that you can utilize:
- Natural Leading Lines: These include rivers, tree branches, shorelines, or mountain ridges. They are organic and often create a more natural and serene atmosphere.
- Man-made Leading Lines: Think roads, bridges, fences, or architectural elements like walls and paths. These lines are typically more structured and can add a sense of direction or movement to your composition.
- Implied Leading Lines: These are lines that viewers infer rather than see explicitly. A person’s gaze or a pointing hand can serve as implied leading lines, suggesting a direction or focus point.
How Leading Lines Guide the Viewer’s Eye
Leading lines work by naturally guiding the viewer’s eyes through the photograph, often towards the main subject. They create a visual journey, adding layers of interest and depth. Here’s how they accomplish this:
- Directing Attention: Leading lines help in steering the viewer’s attention to a specific part of the image. By strategically placing these lines, you can ensure that viewers notice the essential elements of your photo.
- Creating Depth: Leading lines contribute to the illusion of depth in two-dimensional images. Diagonal and converging lines are particularly effective in making the viewer feel as though they are entering or moving through the scene.
- Enhancing Composition: When used thoughtfully, leading lines can heighten the overall composition, making it more dynamic and engaging. They can break up an otherwise static image and introduce a sense of direction and flow.
Examples of Using Leading Lines Effectively in Your Shots
Let’s look at some practical examples of how to use leading lines to elevate your photography:
1. Roads and Pathways: One classic example of leading lines is using roads, trails, or pathways. Imagine a winding road leading up to a mountain peak. The road itself acts as a guide, drawing the viewer’s eye toward the towering mountain in the background.
2. Bridges and Railings: Architectural elements like bridges or railings are excellent for creating strong leading lines. For instance, a photo of a bridge taken from an angle where the lines converge in the distance can create a sense of vastness and exploration.
3. Rivers and Streams: Natural elements like rivers and streams can form gentle, flowing lines that add tranquility to landscape photos. Position yourself so that the river leads towards a focal point, such as a distant waterfall or a setting sun.
4. Buildings and Structures: Urban environments are ripe with leading line opportunities. Use the edges of buildings, rows of windows, or lines created by streets to guide viewers through a bustling cityscape, directing them towards a key subject, like a towering skyscraper or a person walking.
5. Lines in Nature: Look for patterns in nature, such as rows of trees, vineyard lines, or even shadows cast by the sun. These natural lines can lead the eye to a central figure or a particular point of interest within the frame, like an ancient tree or a quaint farmhouse.
Practicing with different types of leading lines and observing their effects on composition will significantly improve your photographic skills. Over time, you’ll develop an instinct for identifying and leveraging these lines to create compelling, well-composed images. Happy shooting!

Mastering Balance and Symmetry in Your Photos
Different Types of Balance: Symmetrical, Asymmetrical, and Radial
Balance and symmetry play a crucial role in the composition of photographs, and understanding the different types can elevate your skills significantly.
Symmetrical Balance
Symmetrical balance occurs when elements on either side of a central axis are identical or very similar. Imagine a perfectly mirrored image. This type of balance is often soothing to the human eye because it reflects a sense of harmony and stability. Architectural photography, nature landscapes, and even portraits can benefit from symmetrical balance, as it often conveys a sense of formality and elegance.
Asymmetrical Balance
Asymmetrical balance doesn’t rely on mirroring. Instead, it uses different visual elements to create an equal sense of weight across the composition. This kind of balance is dynamic and can be more interesting because it often surprises the viewer. Think of a photo where a large, dark object on one side is balanced by a cluster of smaller, lighter objects on the other. Achieving asymmetrical balance can be challenging, but it is well worth the effort as it often results in a visually compelling image.
Radial Balance
Less common but equally beautiful is radial balance, which occurs when elements radiate from a central point, like the spokes of a wheel or the petals of a flower. Radial balance draws the viewer’s attention inward, focusing on the center and creating a sense of wholeness and cohesion. It’s particularly effective in macro photography, intricate architecture, and abstract compositions.
Tips for Achieving Balance in Your Compositions
Successfully incorporating balance into your photographs can drastically improve their visual appeal. Here are some practical tips to help you achieve this:
1. Use Natural Frames
Natural frames like doorways, windows, or tree branches can help balance elements in your scene. They draw the viewer’s eye to the primary subject while providing a balanced and structured feel to the composition.
2. Pay Attention to the Visual Weight
Objects in a photograph have different visual weights determined by their size, color, and texture. A small, brightly colored object might balance a larger, duller area. Pay attention to how these elements interact to achieve an aesthetically pleasing balance.
3. Be Mindful of Negative Space
Negative space, or the empty areas around the subject, plays a significant role in achieving balance. Too much negative space can make your photo feel empty, while too little can make it appear cluttered. Finding the right amount can help your subject stand out while maintaining a sense of balance.
4. Balance Through Color
Colors also carry visual weight. Bold, vibrant colors can balance more subdued hues. For instance, a splash of red can balance a larger area of neutral tones, guiding the viewer’s eye and enhancing the overall composition.
The Role of Symmetry in Creating Visually Appealing Photographs
Symmetry is not just about mirroring objects. It’s about creating a sense of order and harmony, making your photographs naturally engaging and pleasing to the eye.
Symmetry Enhances Formality and Structure
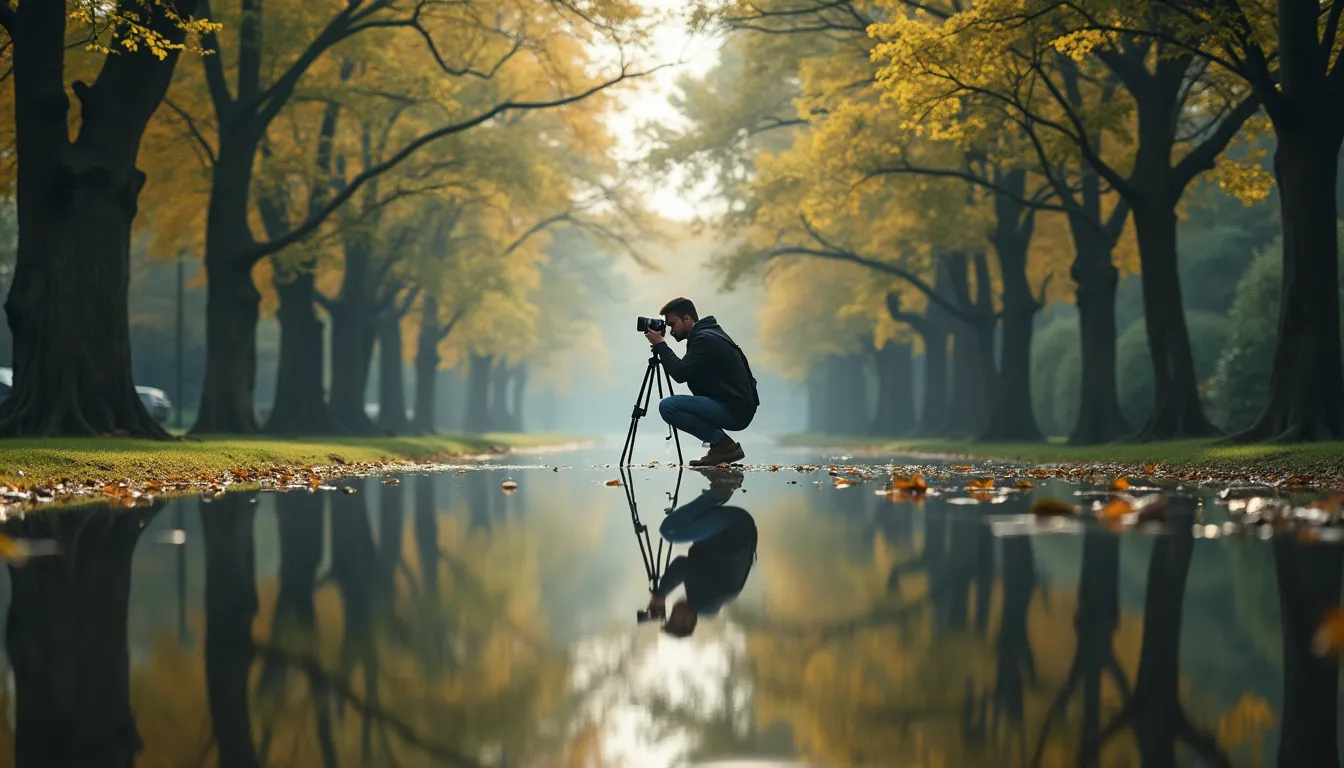
Symmetry is often used in architectural and landscape photography to emphasize the formality and grandeur of the subject. Buildings, bridges, and reflections can all benefit from symmetrical composition. For example, capturing the reflection of a building in still water can double the visual impact and create a striking image.
Symmetry Can Evoke Emotions
Depending on the subject and context, symmetry can evoke different emotions. A perfectly symmetrical newborn’s face can evoke a sense of purity and innocence. In contrast, the symmetry of a rugged mountain can evoke awe and admiration. Understanding the emotional impact of symmetry will help you use it more effectively.
Breaking Symmetry for Effect
While symmetry is visually pleasing, sometimes breaking symmetry can create interest and draw attention to the subject. Imagine a perfectly symmetrical scene of a park, with a lone jogger breaking the balance. This not only adds dynamism but also tells a story, engaging the viewer’s interest.
Practical Exercises
1. **Symmetrical Portraits**: Start by practicing with symmetrical portraits. Use a central point and ensure both sides mirror each other. This could be particularly engaging with subjects like people, pets, or even buildings and landmarks.
2. **Utilize Grid Overlays**: Many cameras have grid overlays that can help you compose symmetrically. Use these grids to align key elements symmetrically.
3. **Experiment with Reflections**: Water bodies, mirrors, and glass surfaces can be used creatively to achieve symmetry. Experiment with different angles and perspectives to find the most compelling symmetrical compositions.
By mastering balance and symmetry, you’ll add another layer of professionalism and artistry to your photos, making them resonate more deeply with viewers. Whether you’re pursuing symmetry for its harmony or breaking it for added intrigue, your photographic compositions will be all the better for it.
As you embark on your photographic journey armed with the fundamental composition rules, you’ll find that the Rule of Thirds, leading lines, and the mastery of balance and symmetry serve as powerful tools in your creative arsenal. Understanding the Rule of Thirds will ground you in the essential practice of positioning your subjects and elements to draw the viewer’s gaze naturally and effectively. By continuously applying this rule, you’ll begin to see an elevation in the dynamism and interest of your photos.
Leading lines, whether they appear in the form of roads, fences, or even the arms of a tree, are your allies in guiding your audience through the narrative of your shot. Recognizing and utilizing these lines proficiently will allow you to create images with depth and a clear visual journey, making your compositions not just a passive experience but an interactive one.
Achieving balance and symmetry is the artful dance that keeps the viewer’s eye entertained but not overwhelmed. Whether you achieve it through symmetrical, asymmetrical, or radial arrangements, balance ensures that your images are harmonious and pleasing to look at. Symmetry will often lend a serene and stable quality to your photos, whereas asymmetry can introduce an engaging dynamic tension.
By incorporating these composition rules into your photography, your beginner shots will transform into compelling visual stories. Remember, these guidelines are not rigid laws but starting points to develop your unique style. The more you practice and experiment, the more intuitive these techniques will become, paving the way for your creative expression to flourish. So, get out there, camera in hand, and let the world see your newfound photographic prowess!
RELATED POSTS
View all


